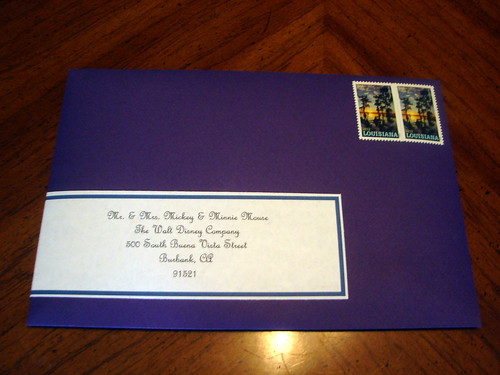
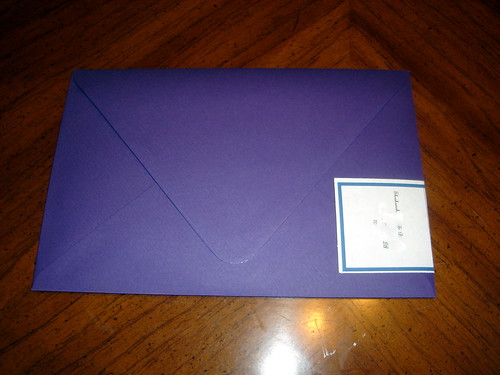
When it came to addressing our envelopes I knew I wanted wraparound labels. I loved the idea of calligraphy, but I just didn't think the money was worth it. I didn't want to attempt to print directly on envelopes. And I don't have pretty enough writing to hand address them. Plus I think wraparound labels looks fairly professional, and not too labor intensive.
With all my success finding already made tutorials, I was sure I'd also fine one for wraparound labels. But all I really found was Martha Stewart's template, which was adobe, and I wasn't completely sure how to do a mail-merge in adobe. I did find someone who said they made their wraparound labels in word, so I figured after all the design work I already put into the invites, coming up with wraparound labels would be a snap.
It actually wound up being a lot easier than I thought, and if I had known how easy, probably wouldn't have wasted time google-ing one. But since I was determined to find a template and failed, I'm sure there's others on a similar mission. So here's my official Microsoft Word wraparound label tutorial.
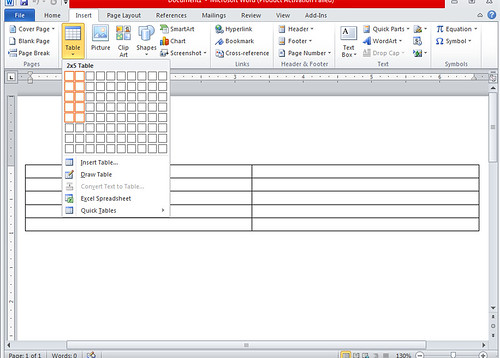
Insert a 2x5 table.

Set your first column to its desired width. (For me that was 2", but depending on how much you want on the back that can change.)

Set the second column to your desired width. (Again for me this was 6".)

This probably should have been my first step, but this is when I actually remembered to change the printer to landscape, so it would actually look and print correctly.

Set the top, middle, and bottom row to your desired height. (I actually wanted to use 2" here, but doing so only fit 2 labels on the page. Instead I used 1.82" which got all 3 to fit.)

Highlight the 2nd row and right click to get to Borders and Shading. You want to click the left, middle, and right border to get rid of them, and then do the same on the 4th row.
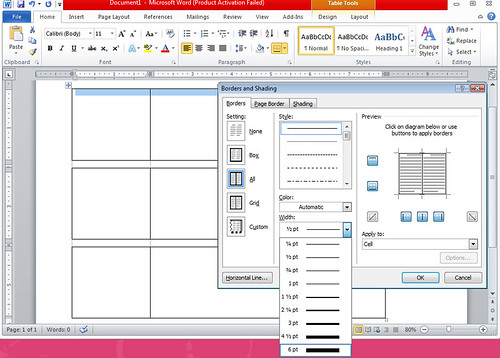
Go to Borders and Shading, this time for row 1, and change to desired thickness. (I used 6pt, which is the maximum available (at least easily available... there may be ways to make them thicker that I'm basically too lazy to research.))

There you can also change the color.
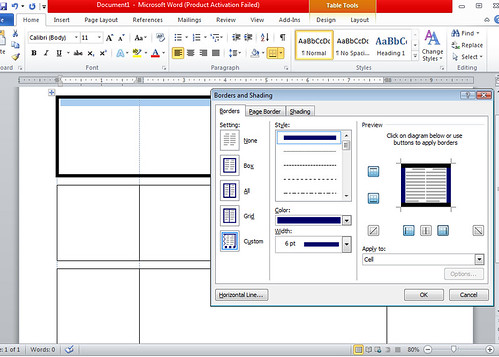
You'll need to click the desired border to apply the change. Here you can tell I've already applied it on the left and right, but not the top or bottom.

For the middle I went back down to 1/4 pt, and from here you need to click the middle border to apply it.
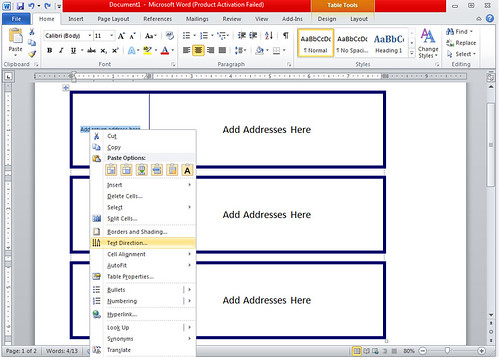
And since I had no idea this existed until I was making my labels, there's an easy way to change the direction for the return address as well.

Now you're ready for your mail-merge! Which I won't be doing a tutorial on, because I still have issues with it. But I'm sure if you look there's tons of tutorials on that out here.
How did you decide to address your invitations? Did anyone else go with wraparound labels?


awesome instructions! thanks so much
ReplyDeleteWhere did you buy the labels?
ReplyDeleteGreat tutorial.
It's actually just normal computer paper (from Office Depot) that I cut out and then stuck to the envelopes with a glue runner. A lot less complicated than it looks!
Delete